Easy Trick to Replace Front Headlight on A Chrysler 200
Chrysler 200 Headlight Bulbs Replacement Guide
How to change a low / high beam or front turn signal light bulb in a 2nd generation 2015, 2016 & 2017 Chrysler 200.
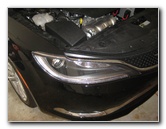
2015 Chrysler 200 Headlight
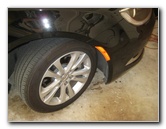
Turn Front Wheels
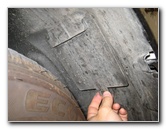
Wheel Well Access Door
Owners of other Chrysler, Dodge, Jeep, RAM or Fiat vehicles such as the 300, Pacifica, Town & Country, Avenger, Charger, Challenger, Journey, Dart, Durango, Magnum, Grand Caravan, Fiat 500, Fiat 124 Spider, Grand Cherokee, Renegade, Wrangler, Compass, Liberty, Patriot, ProMaster, 1500 and C/V Tradesman minivan may also find these DIY instructions to be helpful.
The compatible replacement light bulb part numbers are as follows: Low / High Beam Headlight # 9012, Front Turn Signal # PWY24W and Side Marker # 2821 (or W3W).
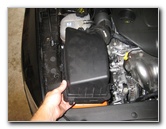
To access the turn signal bulb on the passenger side requires removing the top half of the engine air filter box. You'll need a Phillips head screwdriver to remove the air box cover.
A pair of needle nose pliers is useful for removing the turn signal socket.
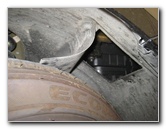
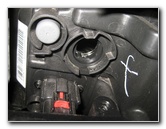
Open Access Door
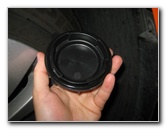
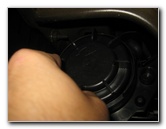
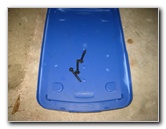
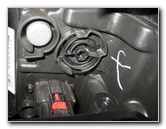
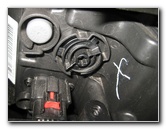
Plastic Dust Cap
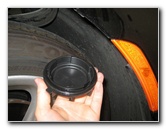
Twist Off Counterclockwise
Moving the front wheels will help create more working room in the wheel well to easily access the old light bulb.
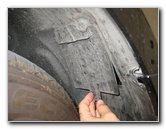
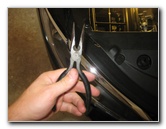
Locate the black plastic access flap on the front of the wheel well liner or "splash guard".
Gently release the round black plastic fastener by either prying it up or by turning it counterclockwise depending on your model year.
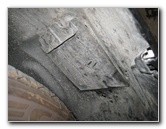
Swing open the access flap and rest it on the tire.
Update - Another 200 owner sent me a tip about opening the plastic access flap. Instead of removing the stubborn plastic rivet on the bottom of the flap, you could just rotate the plastic screw on the top of the flap 1/4 turn in the counterclockwise direction with a Phillips head screwdriver to release it. Then flip the cover down in front of the tire for easy access to the bulb housing.
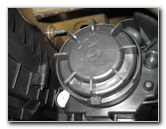
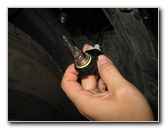
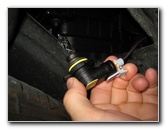
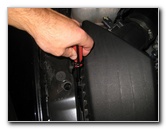
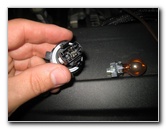
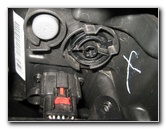
Twist off the round black plastic dust cover on the rear of the headlight bulb housing.
Set the dust cap aside in a safe place.
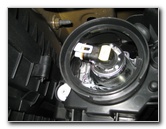
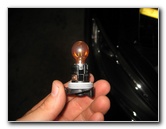
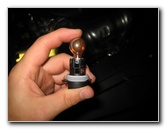
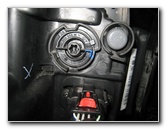
Low/High Beam Bulb
1/4 Turn Counterclockwise
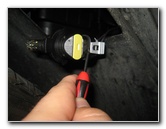
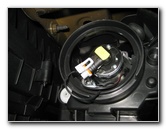
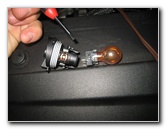
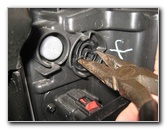
Pull Out Old Light Bulb

Push Release Tab
Lift Clip With Screwdriver
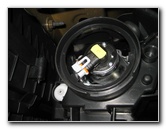
Power Plug Detached
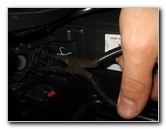
If you have trouble releasing the retaining clip, use a small flathead screwdriver to gently pry it up.
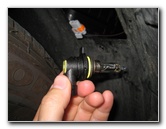
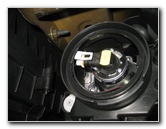
Separate the electrical connector from the base of the old light bulb.
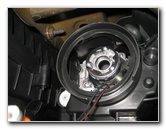
Empty Bulb Socket
New Bulb - Push On Plug
Install New Headlight Bulb
If you do get the new bulb dirty, wipe it clean with a paper towel and some rubbing alcohol.
Push the power plug on to the base of the new number 9012 headlight bulb until it clicks securely in to place.
Insert the new headlight bulb in to the housing and rotate it 1/4 turn clockwise to secure it in place.
1/4 Turn Clockwise - Lock
Round Dust Cover
1/4 Turn Clockwise - Lock
Close Access Flap
Secure Plastic Fastener

Front Turn Signal Light
I accidentally damaged the fastener, so I just tucked the plastic tab behind the wheel well liner to hold the flap in place.
The front turn signal light bulb is located closer to the inner corner of the headlight assembly.
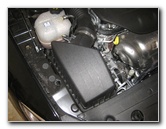
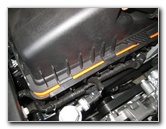
Engine Air Filter Box
Loosen Screws
Phillips Head Screws
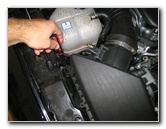
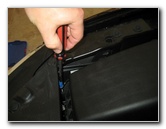
Remove the three Phillips head screws on the left side of the air box cover by turning them counterclockwise.
2nd Screw
3rd Screw - Left Side
3 Screws Removed

Three Tabs - Right Side
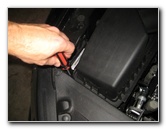
Lift Air Box Cover
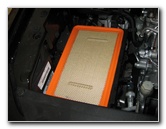
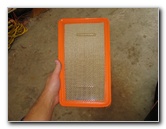
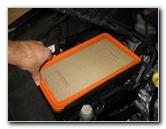
Engine Air Filter
Lift the air box cover and remove the engine air filter. Set it aside in a safe place for re-installation later on.
Remove Air Filter
Move Away Air Box Cover
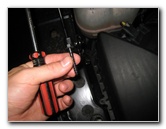
Needle Nose Pliers
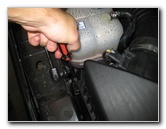
You may be able to rotate the turn signal bulb socket with your fingers. I find it much easier to use a pair of needle nose pliers.
Turn Signal Bulb Socket
1/4 Turn Counterclockwise
Remove Light Bulb Socket
Turn Signal Removed
Separate Bulb From Socket
Turn Signal Bulb Removed
You may need to use a small flathead screwdriver to very gently pry back the retaining clips.
(The OEM bulb was marked as part number 28032 HIR2.)
Push On New Bulb
Empty Bulb Housing
Re-Insert Bulb Socket
Push a new amber colored number PWY24W light bulb in to the socket.
Re-insert the bulb socket in to the housing and rotate it 1/4 turn clockwise to secure it in place.
1/4 Turn Clockwise - Lock
Turn Signal Bulb Replaced
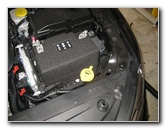
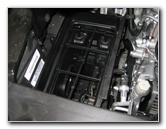
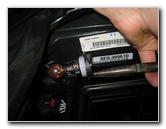
Driver Side - 12V Battery
You may choose to remove the 12V automotive battery for better access.
Driver Side - Turn Signal
Replace Air Filter
Re-Insert Plastic Tabs
Slide the three plastic tabs on the air box cover in to their corresponding slots.
Secure Air Box Cover
Tighten Screws Clockwise
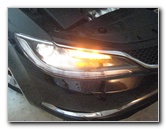
Test New Light Bulbs
Try to avoid over tightening the screws to prevent from damaging the plastic air filter housing.
If your 200 is equipped with traditional incandescent side marker light bulbs instead of LED side markers, the small bulb socket can be accessed through the wheel well liner. The replacement miniature wedge base bulb part number is 2821 or W3W.
For more, please check out all of my 2015-2017 Chrysler 200 DIY Repair & Maintenance Guides.
Source: https://paulstravelpictures.com/2015-2017-Chrysler-200-Headlight-Bulbs-Replacement-Guide/
0 Response to "Easy Trick to Replace Front Headlight on A Chrysler 200"
Post a Comment